Wall paneling has been in trend for the last one year. It is one of the most inexpensive and simple ways to decorate your house, making the walls even more beautiful. Not only will this make the walls appealing, but if your walls have rough and patchy surfaces or need some healing, they will help you hide them.
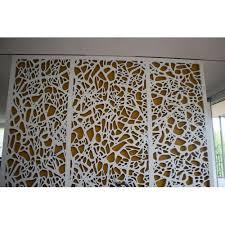
With the help of a wall paneling kit, you can install these DIY MDF wall panels very quickly as they are pre-made. But remember one thing, not all setup kits are the same; thus, take your time to study the stuff you are buying. Also, please think of the panel design you want, whether it will cover the whole wall or not, so that you will not face any problems while installing.
Following are some simple steps that will guide you fit the MDF panels:
Take dimensions
- The first step you should follow is to measure the wall’s length, breadth, and height. Take the tape for this purpose and check at least 3 to 4 times to be super specific and not to forget while purchasing, note down what you have measured.
- Now before buying anything, determine the number of boards you want. Next, make a blueprint so that you have an idea of how the wall will look after renovation. Also, the drawing will help to visualize everything.
Do preparation
Even though the MDF wall panelling helps in covering the multiple problem areas, still, you have to repair some other problems with the wall before you begin installing the panels:
- With the help of a block attached with sandpaper, remove all the loose masses on the plastered surface or take out the paint.
- By using a filling knife, fill all the gaps, if any.
- After smoothing all the areas where the boards will be installed, start decorating your wall.
Fix the panel
- Now with the help of solid glue, start placing and attaching the rail at the wall’s bottom and compress at least once or twice to fix them securely. Then let it dry.
- After putting on the base, begin fixing the top, and then you can set it on the sides. Make sure that they are in the correct position before sticking them.
- Continue to place a rail one at a time, and then you can attach the parallel ones in the end.
- After finishing all of them, check if there is any gap, seal that space and leave it to dry. Apply Primer
Prepare the area where you have fixed the bars using an oil-based primer so that the paint stays for a long time when you paint the whole panel. To apply the coat of the primer, use a froth roller. To cover the corner and narrow space, utilize a small brush.
Paint
Now, after putting all the bars on the panel and applying the primer, your wall is ready to paint; use Matt finish wall MDF paint so that you can clear the dirt later. Next, start painting the surface with a roller, and after the process, leave the wall for at least 3-4 hours
Coating
This step is not compulsory, but if you want to protect the panel’s paint, you can apply a water-based varnish to the wall.