Construct DIY board and batten shutters for your exterior windows and improve your curb appeal. These simple wooden shutters have been used for decades to make homes more attractive, comfortable, and safer. In this article, we’ll show you How to Make Wooden Board-n-Batten Window Shutters and how to choose the right wood, take measurements, and give a step-by-step construction guide, plus the hardware you need to make it all work.
Woodworking Tools
- Circular saw
- Chisel
- Mallet
- Jigsaw
- Bar clamps
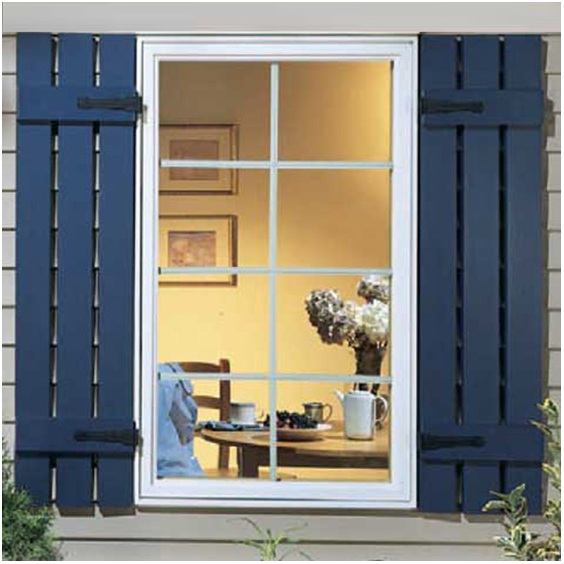
This is not only the simplest but also one of the most versatile windows shutters’ styles. It is easy to spot board-and-batten variants of charming traditional houses and the latest shingled cottages. It mimics ancient craftsmanship with its attention to detail and various styles to suit different window shapes. What’s more, board-and-batten assemblies are simpler to build compared to paneled and louvered design.
Materials Needed
- Wood – 2 pieces of 1 x 6-inch boards & 1 piece of 1 x 8-inch board
- Nails
- Wood glue
- Miter saw
- 10-inch offset strap hinges
All you require to make your own is hard-wearing wood and several hours of work. Use the jigsaw to create an embellished cutout for some personal touch. If you would want to get pre-built hardware, your options multiply to include affordable vinyl or foam variations that fasten to the siding, as well as strong composite or custom wood shutters swinging on hinges to stop the elements. Either way, your newly decked windows will be more stunning because of your efforts.
Choosing the Right Wood
Your shutters will go on the outside of your house. There, it’s vital to pick a wood type that is resistant to rot and takes paint well. Access to wood species often varies by region. Some decent options comprise Western Red Cedar available about anywhere, Redwood in the West, Cypress in the South, and the Eastern White Pine in the Northeast, although you can go with anything that fits your needs.
A few of the varieties you’d want to overlook at all costs include Oak and Poplar. The latter holds paint better than virtually any wood, except it has poor rot resistance and will wear quickly. Although Oak’s rot resistance is average, it is appalling at accepting paint. Oak is a possibility only if you want to do varnished shutters.
Taking Measurements
Shutters are engineered to provide a perfect fit within the window. Your shutter will go in the same area as your storm or screen windows when it is closed. Measure the width and height of this opening on several windows. Maybe your window is irregular, potentially causing your shutters to fit poorly unless you modify the first.
Assuming you have a standard size old window measuring 30-inches wide by 60-inches high, your shutter should fit within that space and leave a little room on either side. Therefore, your new overall dimensions should be approximately 29.5” x 59.5”. Subtracting 0.5 inches from each measurement should give you a gap of 0.25 inches around the window.
Only a few more calculations and we are done. For board and batten window shutters, you need to determine the sizes of your boards. To create this guide, we had to use two 1- by 6-inch boards and a piece of slightly ripped down 1- by 8-inch board at the center to achieve the right width.
Constructing Your Batten Board Shutters
Use a miter saw to cut all your boards to length before making any required rips to accommodate your window’s width. After that, cut two or more battens per shutter, which will run transversely across the boards and should measure slightly less than your shutter’s width. Alternatively, you can get all of your boards cut at the local home improvement shop.
Assembling
With everything cut, use a table to confirm your measurements and try out different batten layouts. Once you find your pattern, nail down the batten into each board without skipping any of the boards. You can use other options such as construction adhesive, narrow crown staples, wood glue, or screws to assemble it. Be sure to check for and fill nail holes, sand the shutter smooth using 120-grit sandpaper before painting it your favorite color.
Mounting Your Shutters
There’s plenty of shutter hardware that makes it is difficult to choose. Check online for the best e-hardware, select the products you like, and inquire about the right size and offset for you. That’s how to take the hassle out of a confusing installation process. The options for mounting shutters are endless, so ask your hardware to help you get the right stuff.
Hinges
For this guide, we used 10-inch offset strap hinges to install the shutters and a modest eye latch. With only 3 screws, installing these strap hinges is a breeze. Center the hinges on each of your battens for easy screwing.
Lintel
With the straps on, you have to join the hinge’s lintel to the trim of your building. Installing this lintel isn’t hard either. Just put the shutter where you’d like it to rest when closed within the window opening. Use a few shims to keep the shutter off of the window sill when mounting.
Once you fix the shutter, attach the lintel and screw it down to hold it in place. Now detach the shutter and set the other two screws. Replicate that for your top lintel and attach your shutter on the lintels to see how it works. Now repeat these steps for the second shutter.
Shutter Dogs
Open your batten board shutters all the way and fix the shutter dog under the shutter. This will prevent accidental closures when positioned vertically. Screw the shutter dog into place and open it by turning the dog horizontal. You can have the hook and eye on the outside or inside of the shutter, depending on your preference.
Conclusion
Shutters are amazing. They can keep your windows safe from storms or be closed bar the sun for a cooler room in the summer or warmer during winter. When done properly, they look gorgeous and make a splendid addition to an old house.