It’s said that a good picture says more than a thousand words, and they can even convey things that we have no words for. But if the image in question is out-of-focus or poorly framed, the words you’ll get to hear will have no semblance of appreciation.
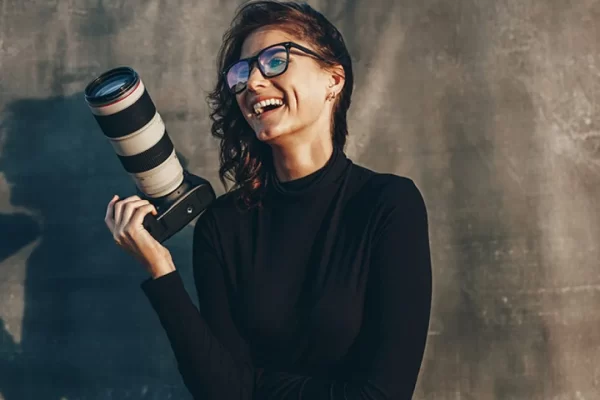
According to science, our brain processes visuals the fastest than any other form of data. So, if you click awesome photos, it’s not only a great career option, it also comes in handy in creating memories, and hell, even your idiot friends, may start to value your company at long last.
Whether it’s mobile or DSLR, amateur or fully professional, there are things that you can do to get more aesthetic shots. Here are 5 simple tips that can transform your snaps from ‘meh’ to amazing.
1.Correct saturation
Every amazing photo gets the basics right, and saturation is a big part of that. In layman’s terms, changing saturation boosts up or drowns out the color dynamics.
In other words, it controls the intensity of the colors present in the photo. The more saturated you make them, the brighter and crisper they get. And when you dial down the saturation level, that punchiness will fade away gradually. In a completely desaturated state, the photos become black and white.
Now, editing photos is pretty subjective and sometimes situational. If you want to deliberately create an eerily overblown (like bright neon lights), unnatural feeling, then too much saturation will serve you just right. Otherwise, you should use it in moderation to add more zest to your pic.
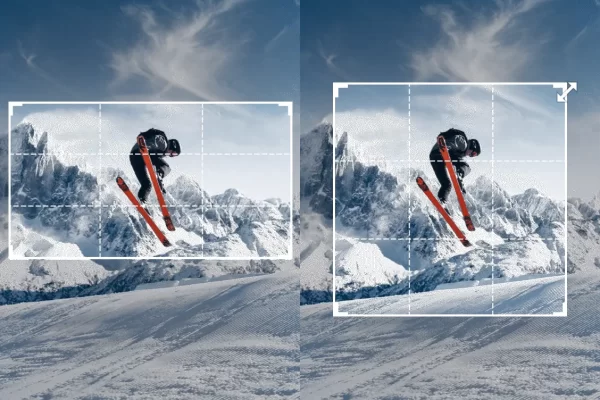
2.Crop it
Cropping a photo is the easiest way to transform its meaning completely. You can erase your errors or anything unwanted, you can better the composition, and last but not least, you can change the focal point.
But if you want to crop, always start with a larger point-of-view and better quality. This is because cropping reduces the resolution and quality of the image bit-by-bit.
And if you’re confused about where your ideal focal point should be, then following the ‘Rule of Thirds’ can be greatly beneficial.
In this photographic technique, you place imaginary lines (two horizontal, two verticals) in a photo, breaking the picture into three parts from each side. The focal point should always be around the four intersections.
In modern cameras, you can take advantage of grids that will help you implement this rule.
3.Blurring
You’ll often see photos where everything looks perfect, barring one point of distraction from your main subject. In those times, you need to highlight what you want to be the focus of your image. To redirect all the attention to that particular area, your best bet is to blur the background.
Blur is also critical in any portrait photo that usually focuses on one subject. It provides a natural oomph to your main subject.
You can also use a more dramatic blur to make the whole picture abstract-looking, to set a palette of vague colors and shapes as the background.
4.Contrast
If you want to make your pictures a bit more alive, a bit more popping, then contrast is the tool you need.
The darks get darker, and the lights become lighter if you play with the contrast a little. You can create various tones that lie in between light and darkness.
When you boost your contrast level, it makes the pic clearer, adding more swagger to everything in reality. But when you reduce it, the image becomes a bit flat, albeit more realistic; you know what you’re doing.
Too much of anything isn’t good, and contrast in pictures is no exception. However, getting extreme will only blow out and pixelate the image, and you’ll lose detail.
5.Color
Images look natural and the most beautiful when they show the right colors. But color sliders can be overwhelming with a plethora of options, making it tougher to pick the right profile.
You can choose to colorize a photo if you have an old black-and-white photo or something that you previously shot in b/w, and now you want to put some colors back in it.
Consider what you want from the picture. If you want Van Gogh-like surreality, then boost the colors all the way (saturation, highlights, etc.). If you wish to do something old-style, push the warmth scale upwards.
Separate all the colors in a picture, and then think about which one/s you want to focus on.
And in the case of nature photography, color falls under personal taste and artistic freedom. There’s no right or wrong, only interpretations.
CONCLUSION
Photography is an art, and like all art forms, there’s no end to learning and reinventing within it. So, start tinkering with your photos, and you’ll get better at learning the compositional elements and the editing.